
Are you looking for the perfect wreath to transition from Summer to Fall? Today I’m going to show you how to make a dried grass & flower wreath that’s perfect for your front door or inside your home.
Create a Stunning Textural Wreath with Dried Grasses and Botanicals
Looking for the perfect decor piece to transition your home from Summer to Fall? This DIY natural wreath, brimming with natural texture and an earthy color story, is the ideal solution. It brings a relaxed, organic vibe to your doorstep that feels both fresh and autumnal at the same time.
This versatile wreath is more than just pretty, it’s also one of the easiest projects you’ll ever make! If you’re new to crafting, this beginner-friendly tutorial will guide you to a stunning result that looks like it came from a high-end boutique.

This post may contain affiliate links, which means I may earn a small commission if you make a purchase through my links, at no extra cost to you. Read my disclosure policy here.
Gathering Your Materials:

Creating this organic modern wreath is simple. Here’s everything I used to make mine. I’ve linked to the exact products and similar options for your convenience.
Materials for this Project
- Straw Wreath Form (Hobby Lobby has them too)
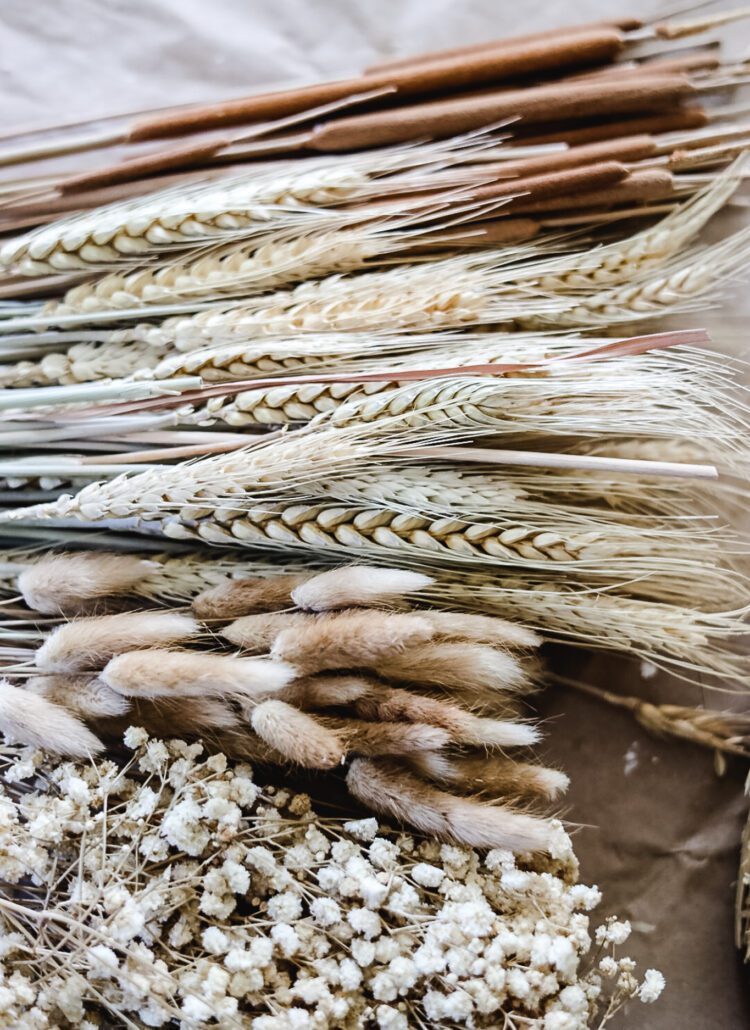
- Dried Wheat
- Bunny Tail Grass
- Dried Baby’s Breath
- Dried Cattails
- Hot Glue Gun
- Scissors
Where To Find Supplies:
You can find dried flowers and grasses at most major craft stores. Don’t forget to check unexpected places like Trader Joe’s or your local farmer’s market for unique pods and grasses-that’s where I found my cattails! For specific colors, online shops are a great resource.
A Note on the Baby’s Breath: I opted for the pre-dried beige baby’s breath I linked to above because I loved its color. You can certainly dry your own from a fresh bouquet to save $$! I had some growing in my garden, but the local critters loved it a little too much and ate it all!
The Step-by-Step Process
Let me show you step by step how I designed this wreath. It’s a fairly easy wreath to put this wreath together.
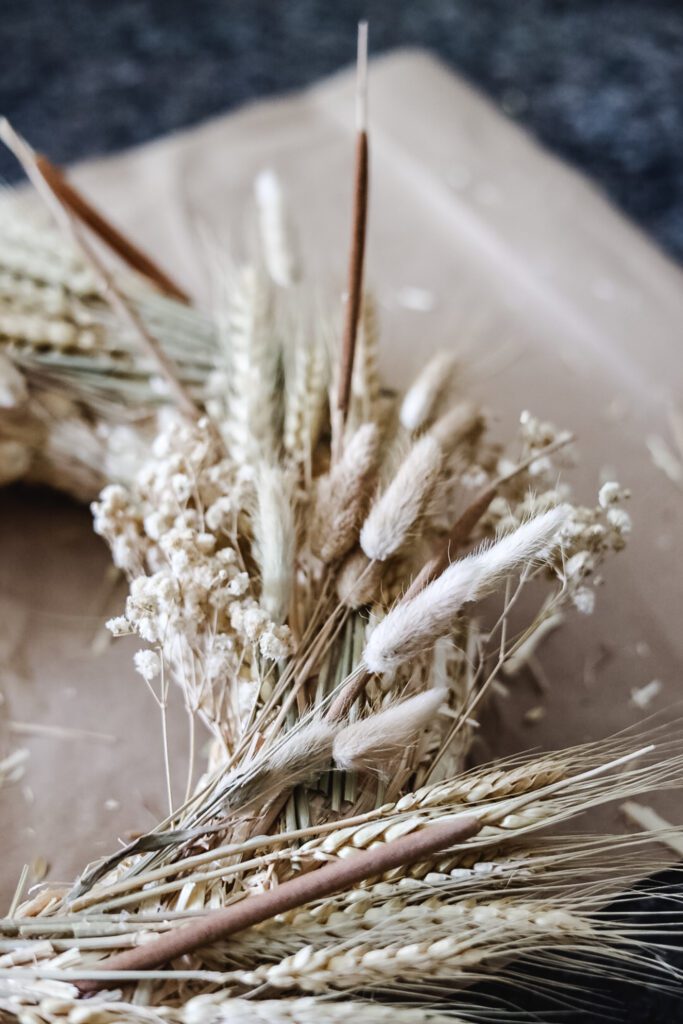
Step 1: Attach the Wheat Stem Base Layer
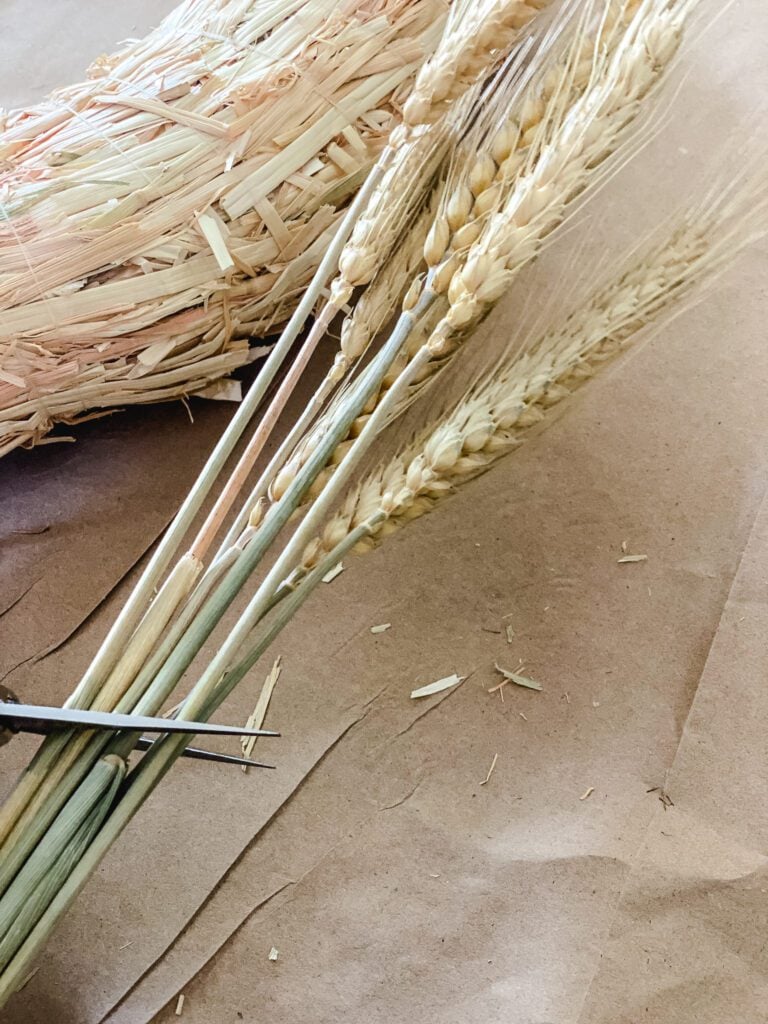
We’ll start by creating a base layer with the dried wheat. Using wire cutters or strong scissors, trim the stems to a length of 3-4 inches. This shorter length is easier to manage and secure.

- For secure attachment: Apply a generous dab of hot glue to the cut end of a wheat stem.
- Immediately press the glued end firmly into the straw wreath form. Hold it in place for 15-20 seconds to allow the glue to set completely. The straw base will hold the glue well and prevent the stems from bending during application.
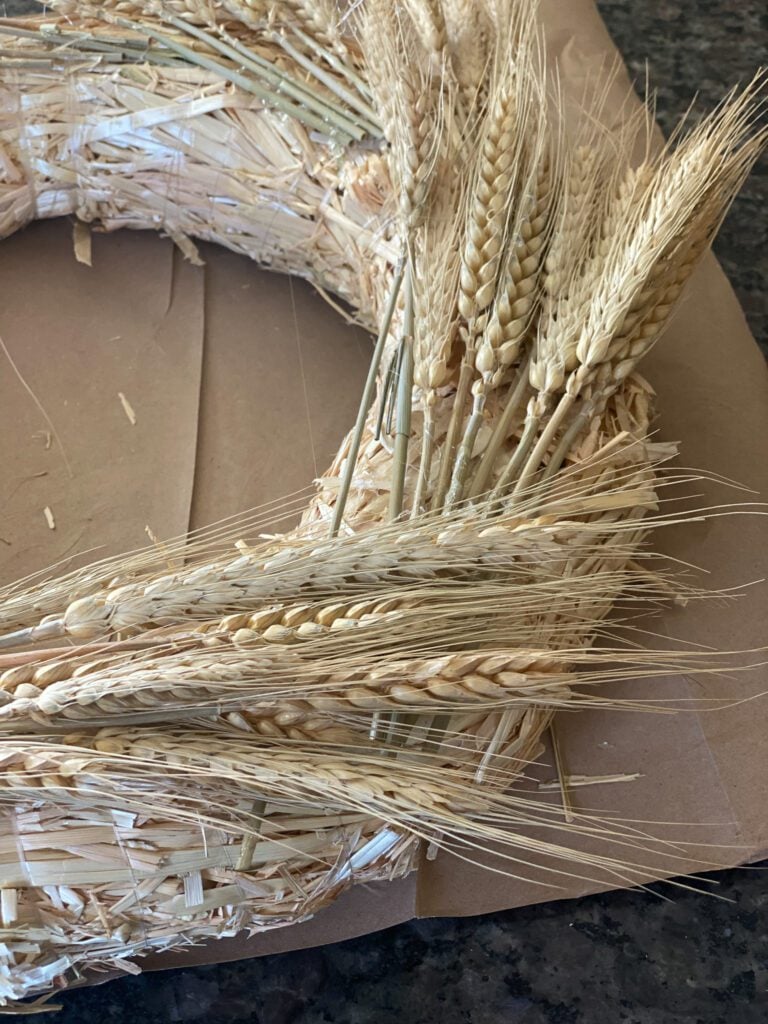
- Arrange with intention: Place each piece so the stems point in the same direction around the wreath—either clockwise or counterclockwise. This creates a cohesive, professional look.
Step 2: Add Visual Interest with Cattails

Next, it’s time to add height and structure with the dried cattails. I scattered a few around the wreath, tucking them in between the wheat stems to create visual variety.
- Pro Tip: Simply poke the sturdy stems directly into the straw wreath form amongst the wheat. Space them out evenly for a balanced look.
- No cattails? No problem! This wreath looks beautiful with just grasses and baby’s breath. You could always add a few pieces of pampas grass for a 4th natural.
Step 3: Add the Fuzzy Bunny Tails
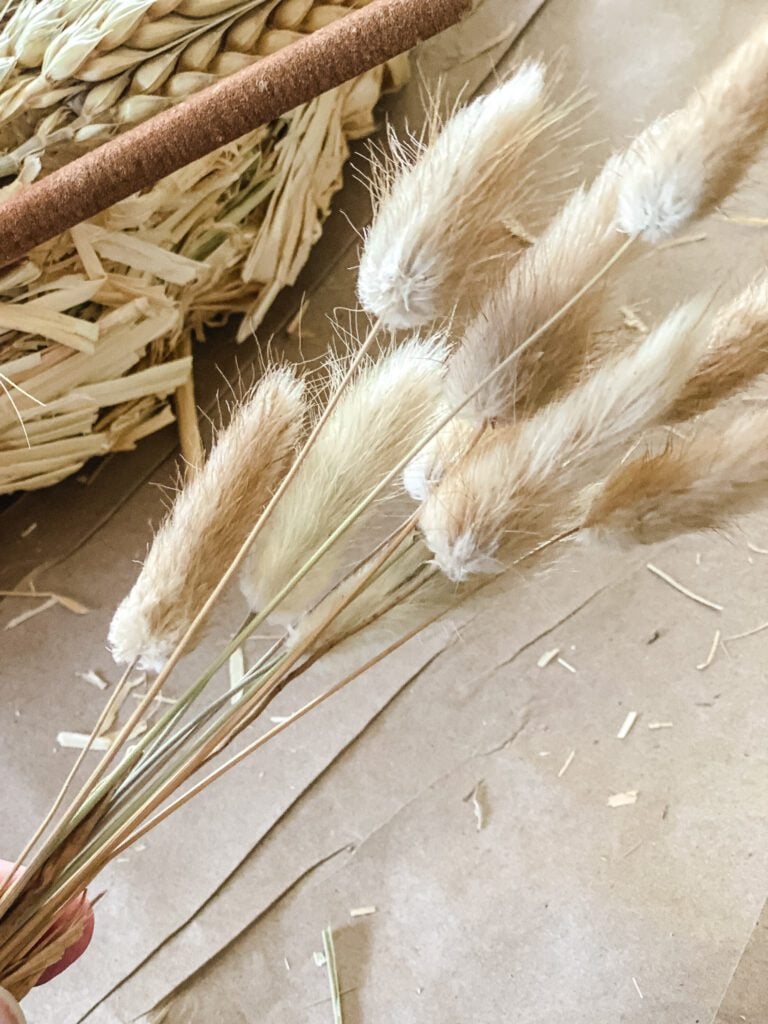
Time to add those irresistibly fuzzy and cute bunny tails! They bring such a soft, whimsical texture to the arrangement.
- Handling delicate stems: The stems on bunny tails are delicate. Gently poke them into the wreath base wherever you see a gap.
- Securing them: For any that feel loose or won’t stay put, use a tiny dab of hot glue at the base of the stem to secure it firmly to the wreath.

Pro Tip: Don’t cluster them all together! Scatter the bunny tails unevenly around the wreath for a natural, organic look that’s full of whimsy.
Step 4: Fill In with Baby’s Breath and Final Accents
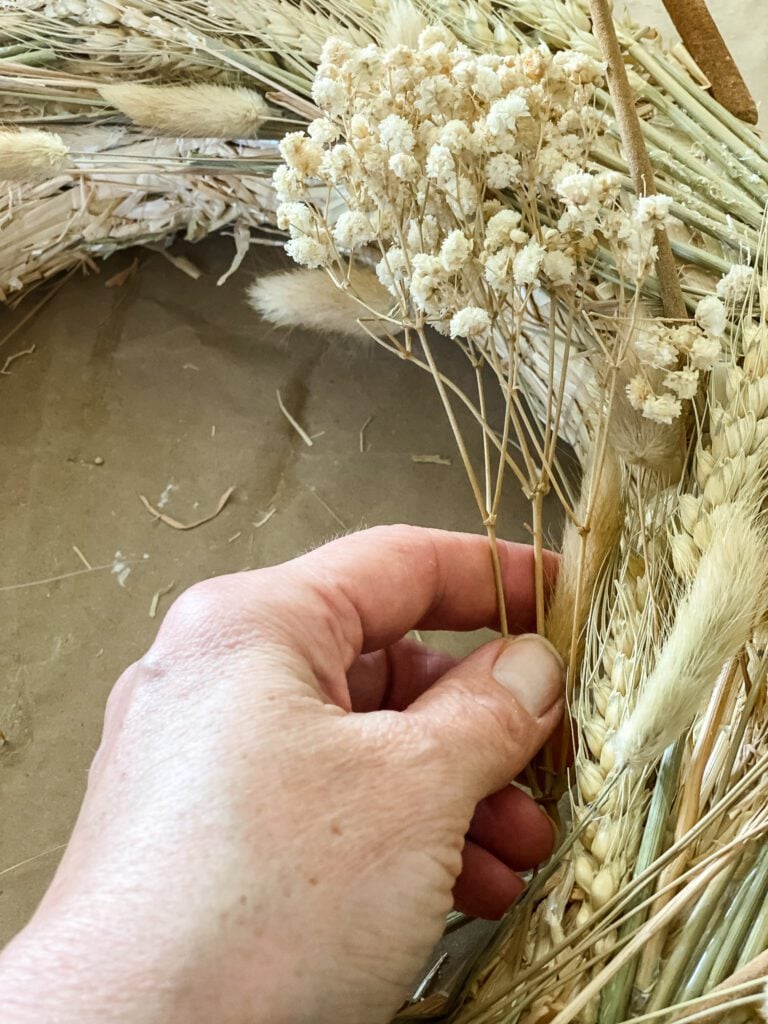
The baby’s breath is the finishing touch that pulls everything together. Its delicate clusters are perfect for filling any remaining gaps and camouflaging the wheat stems and glue points.
- Method: Take small sprigs of baby’s breath and tuck them deep into the wreath base around the entire circle. Focus on the inner and outer edges to frame the wreath and create a lush, full profile.
- Secure: Use tiny dabs of hot glue on the stem of any sprig that feels loose.
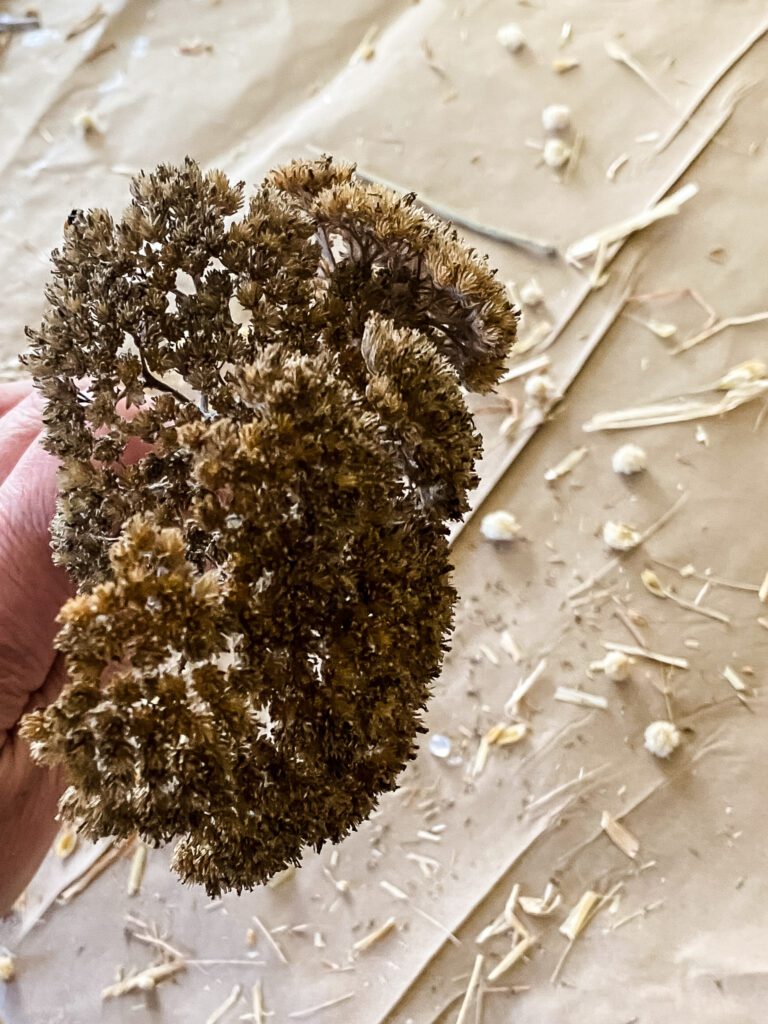
Pro Tip: Forage for Final Flourishes! After I finished, I spotted dried yarrow in my garden and clipped a few stems to add. Look around your own garden or neighborhood for other dried naturals like statice, lavender, or even interesting grasses. This personalizes your wreath and makes it truly one-of-a-kind.

The Final Reveal: A Textural Masterpiece
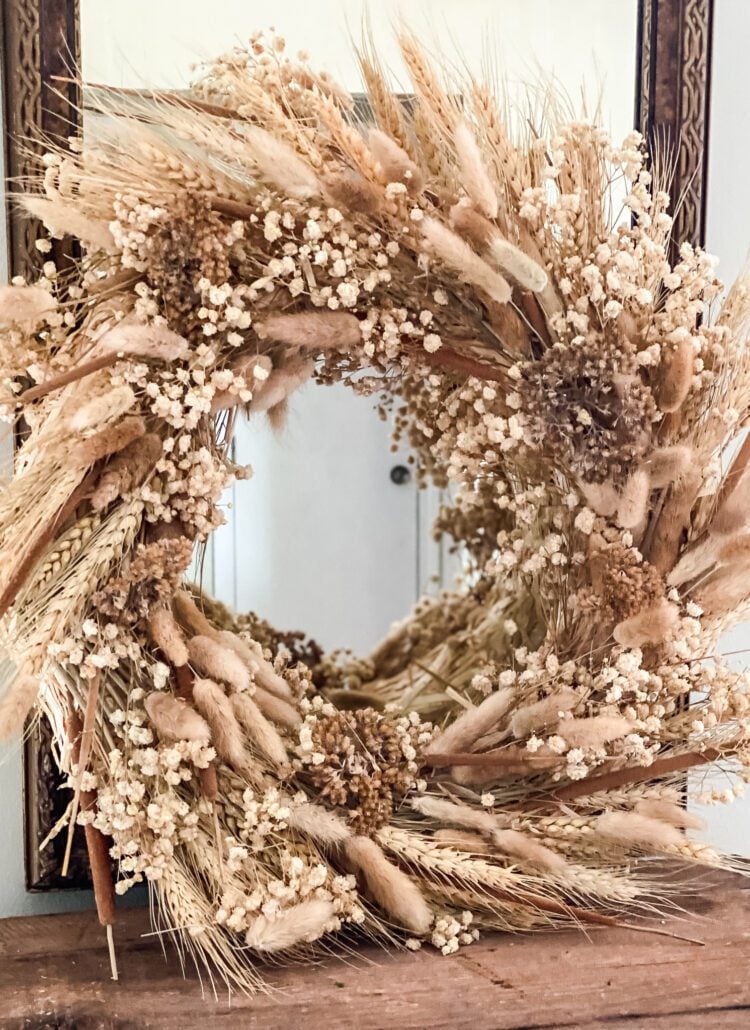
I truly wish you could see this wreath in person! The mix of fluffy bunny tails, sleek wheat stalks, and delicate baby’s breath creates a stunning play of textures and neutral tones that photos can only hint at.
For now, I’ve chosen to hang it on the inside of my front door. This way, I get to enjoy its natural beauty from my kitchen and living room all day long.
A Quick Note on Placement:
If you’d love to showcase your wreath outside, please choose a protected spot—under a covered porch or in a sheltered entryway is ideal. Direct rain and weather will quickly damage the dried materials. And a fun heads-up: you might just have some friendly local birds stopping by for a little snack!
shop supplies:

See your projects featured! If you are inspired by this or any of my other DIY projects, I would love to see them and add you to the Reader’s Spotlight gallery. Send a photo to me at jennifer@cottageonbunkerhill.com
xo, Jennifer

40 Creative Ideas
The Ultimate Guide to DIY Wreaths
25 DIY Projects Using
flowers & botanicals
Latest DIY Wreaths


Hey Jen, I love this wreath so much! I’m featuring it in my weekly newsletter tomorrow 🙂 Happy weekend!
You are the best!!! Thanks, friend!!
This Fall wreath is so beautiful! Thank you for sharing how to make it. I want to make one for my front door. Great Job.
Thanks so much, Meagan!!
So pretty, Jennifer!! I LOVE all of the natural elements you used to create this. The textures on your wreath are just gorgeous. Amazing job, pinned!
Thanks, Rachel!! It’s my whole vibe for Fall!!
Gah! This is gorgeous, my friend! I love the mix of wheat with all of the dried grasses.
Thanks, Jen!! I’m loving all the natural elements this Fall.
I’m loving this wreath. I’m a huge fan of natural elements in home decor.
Pinned
GEAT Job! Have to admit I’m getting wreath tired BUT I really loved this. Great use of color and texture and the perfect base! Enjoy all of your posts! Happy almost Fall!
I know what you mean, Barb!! I like to mix it up on my doors too!!
Absolutely stunning! All of your wreaths are so beautiful! Happy Sunday!
Thanks so much, Renae!! I really love making them!
Jennifer,
That turned out so good. It’s stunning and looks like a 100.00. Or more. Great job. I’m going to share a link next Sunday!
You are the best Rachel!!
You’ve created another pretty wreath! Love it!
This wreath is just perfect for early fall decor. It is so great to be able to save alot of money and make your own wreaths and such fun too. I like taking apart my old wreaths and redoing them. This weekend I am working on a harvest fruit wreath with apples, pears,grapes and figs. All faux and on an old grapevine wreath I had. For a filler I am using some blue/grey eucalyptus. So far so good. Thanks for all your inspiration.
Ooooh, that sounds gorgeous Kathy!! Making wreaths is one of my favorite things to do!